
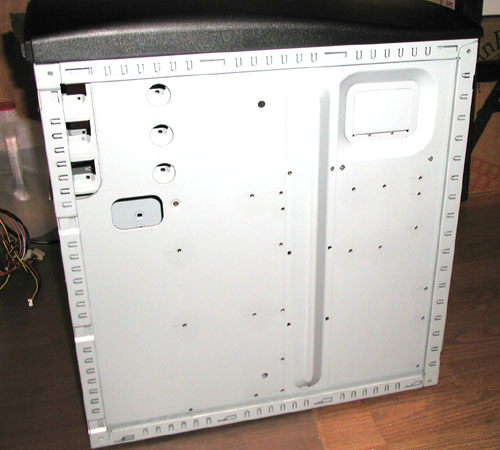
Brand new case. Notice the quality support to the backplane that messed up my plans.
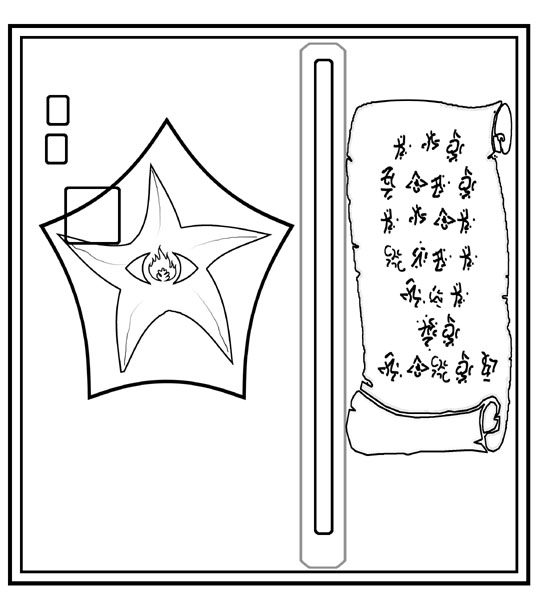
My planning template for the right side.
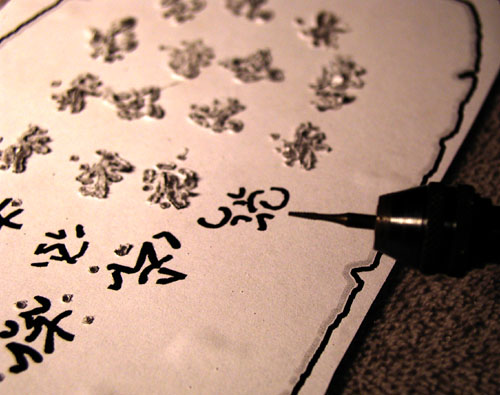
etching through the template with a dremel.

The runes just after etching (third & final attempt)
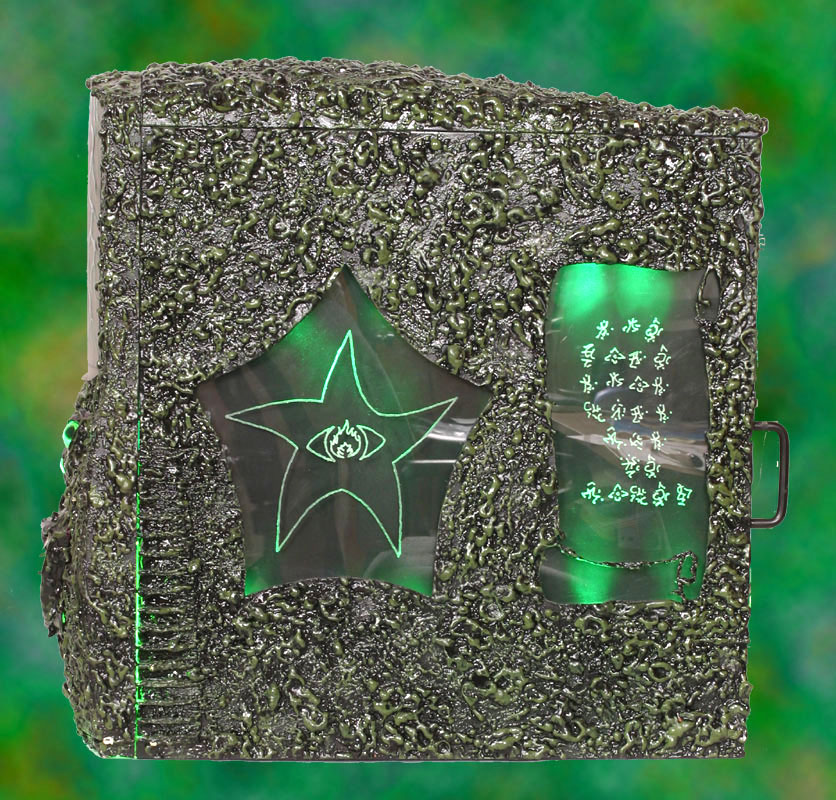
Case in full sunlight to bring out the details.
I decided on a size and shape for the "windows" on this side. They had to fit between the ridge and still leave room for 1/4 inch plastic and the LEDs that would illuminate them. The big parts of the shapes were mostly done with a jigsaw and then a dremel for the fine details. I failed to take any pictures of this side during the cutting processing. Sorry
I spent a fair amount of time creating the etching desings in PhotoShop. The star design is a variation on the classic Elder Sign from the Cthulhu Mythos. The design on the right is a scroll, the writing uses the font "Cthulhu Runes" and says, appropriately enough, THE CASE THAT MUST NOT BE NAMED. Right click and "Save Target As" for the font Cthulhu Runes.

At about this time, I smoothed the edges of the cut out and gave it the texture treatment. (see Texture page for details). I went ahead and painted the whole side panel before doing the plexi windows.
Each of these design was done in 1/8" polycarbonate that I got from a plastics store, in their scrap bin for just a few dollars. (Tip: don't buy your window plastic at Home Depot, look in your phone book for Plastic, Retail and call and ask if they have a scrap bin. Major savings.) It's a good thing I got it cheap, as I had to etch the design 3 times before it came out right. I used my dremel tool, with a router support, and a very small metal carving tip. Several hours and a cramped back later, and I had the design done. I used the clear liquid nails to glue the plastic to the panel. The etching catches the light from the Hard Drive activity flashers and appears to glow.
(More pictures and info about the right side are also found on the Lighting page.
After this was all together, I found I was getting too much reflection off of the backplane, even after I had painted it black. So I got some slick 40# paper and spray painted it with Krylon Ultra-Flat Black. These were glued to the backplane where they act as a very neutral background for the lights.


