
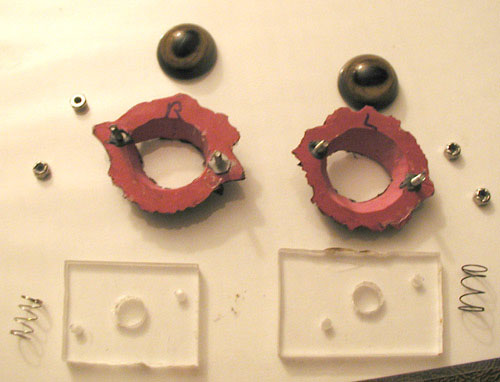
sculpted eye parts
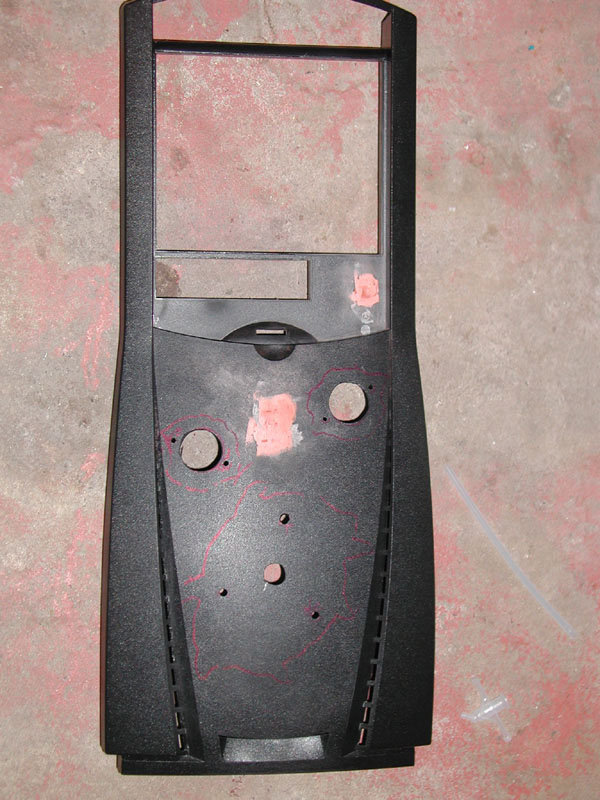
mods to the bezel plate
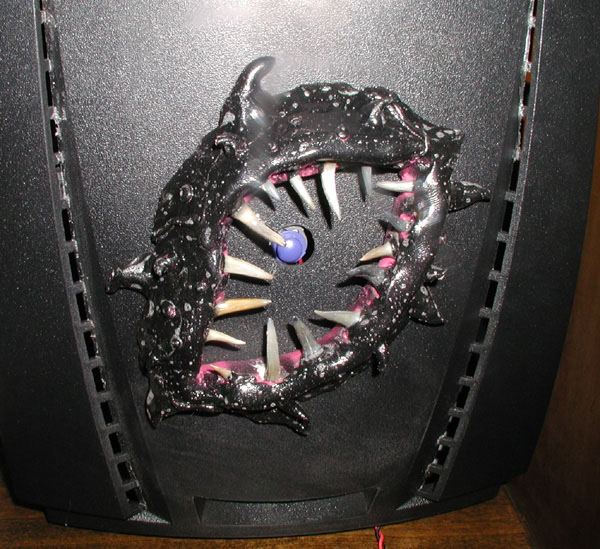
sculpted mouth, test mounted
inside of bezel, with mountings. (mouth hole changed later)
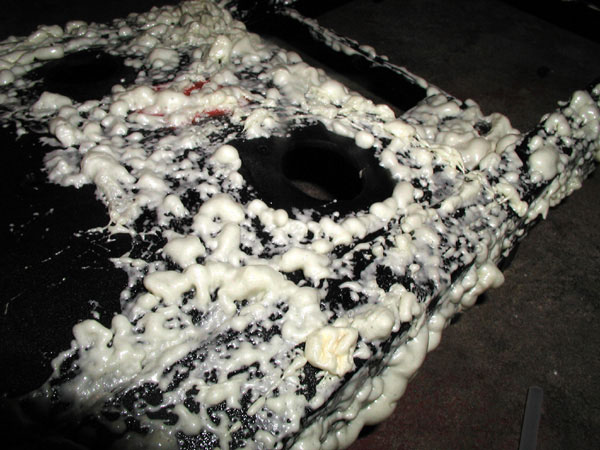
applying foam to bezel
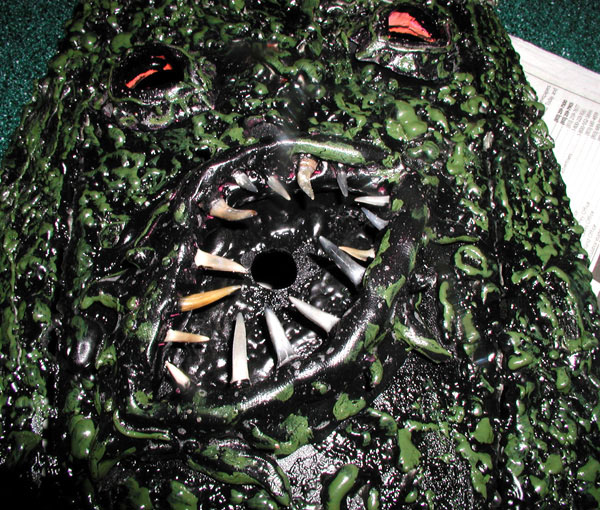
painting the final coat
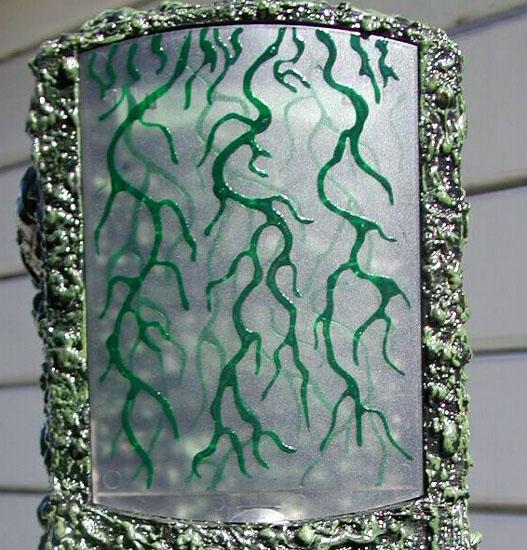
painted on veins
The idea of the eye switches was solidified when I came across the website for Van Dyke Taxidermy, which sold glass animal eyes. I ordered several various sets and finally settled on "African Goat Eyes" as the oddest. I used a polymer clay called Super Sculpy that you can mold and then bake in your oven to harden it. I took my glass eyes and formed the eye ridges around them. Then baked to solidify.
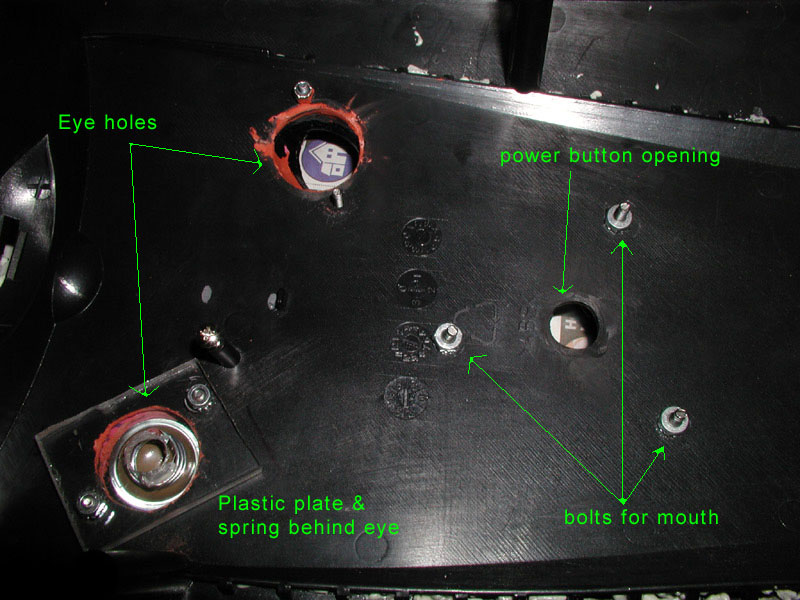
The power button had to be moved from the upper right side, so I disconnected it and sealed the hole in the front bezel. (before the Texturing was done) I drilled a new hole in the lower middle and formed the basic mouth shape on it to fit. The teeth are 2 million year old fossilized shark teeth. These are Sand Shark and Mako teeth I picked them up scuba diving off of Venice Beach, FL. Each was set in the mouth before baking. I made a point of setting the teeth to curve outward, thus I don't rip my own finger to shreds if I catch it wrong.
After baking both, I drilled and set screws into the back of the eyes and the mouth. Then drilled mounting holes on the front bezel to match. I had to take these on and off dozens of times over the Mod, so it was better than gluing them in place.
I mounted the switches onto the front of the case using two pieces of L shaped aluminum with mounting and sliding groves cut into them. This allowed me to move it all about in order to line up the bezel holes and the switches. Behind the eyes is a spring, a post, a clear plastic plate on the bottom of the post and a plate with a hole through it for the post. Thus when I push the eyes, the post pushes back and hits the switch that is mounted to the front of the case.
For the mouth, I expanded the hole to the size of the mouth interior,(sorry, no pictures of this) then put a plexiglas plate over it and mounted the tongue with a post-spring part like the eyes. Then painted around the background, leaving a thin opening around the edges for the green lights to glow.
Speaking of lights, also mounted on the front, under the bezel are 4 super bright LEDs and two 4" CCFL tubes. The LEDs light the eyes and the tubes light the mouth and "gill slits" on the front and side.
After the eyes were done, I removed them, did the texture. Then I painted the whole thing.
Since I'm on the subject of the front of the case, I should mention that I also did the foam texturing on the CD, CDRW, and Floppy bezels. I took them off and did it one at a time. The retracting cover that came with the case looked too bare like it was. So it bought this liquid paint used for "stain glass" craft and drew the veins on it.
That does it for the front.


